A/B testing is about making data-driven decisions instead of guessing what works best. It helps you understand your audience better. However, Webflow A/B testing comes with its challenges. There’s no built-in testing tool, tracking accuracy can be tricky, and if not done right, it can even impact SEO. But don’t worry, we’ve got solutions.

Let’s explore some of the prominent tools that are available to offer reliable A/B testing results.
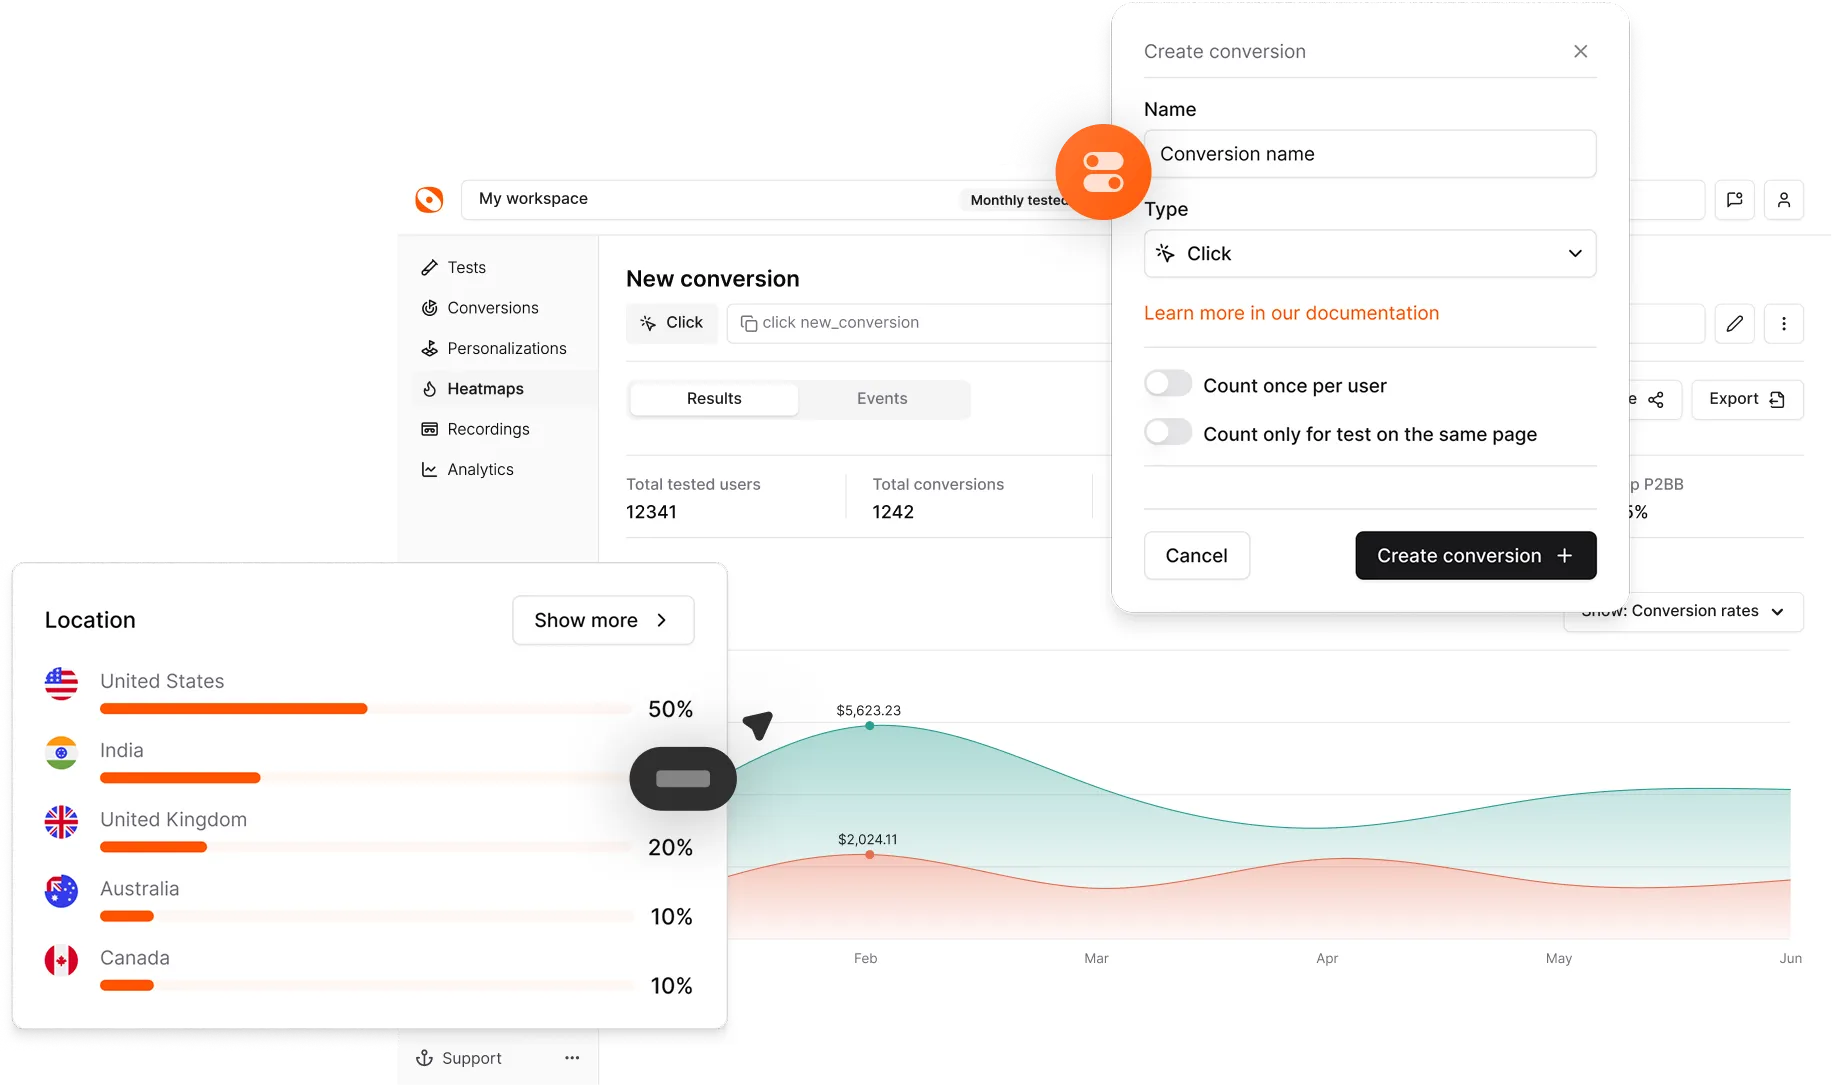
If you want an A/B testing solution made specifically for Webflow, Optibase is your go-to. No third-party scripts, no complex setup, just a seamless way to run tests without leaving Webflow. As a native A/B testing platform, Optibase simplifies the process, making it accessible even if you’re not a developer.
Not ready to use Optibase? There are other options. Tools like VWO and Convert offer powerful analytics but require external script integration. They work well but can slow down your site or complicate setup. If you’re tech-savvy, custom JavaScript solutions give you complete control. However, that also means extra work.
If you're unsure what to test when A/B testing Webflow projects, start with the elements that most influence user behavior and conversions.
When running A/B tests, always focus on one change at a time. This ensures that you know exactly what’s making the difference when results come in.
A/B testing is more than just running random experiments. It requires a structured approach.
Instead of saying, “Let’s see what happens if we change this button,” be more specific. A strong hypothesis would be, “Changing the CTA from ‘Sign Up’ to ‘Get Started for Free’ will increase sign-ups by 10%.”
Running a test on only 50 visitors will not provide reliable data. Before deciding, use an online sample size calculator to determine how many visitors you need.
Don’t stop your test too early. Let it run for at least two weeks to gather accurate results. Ending a test prematurely can lead to misleading conclusions.
Tracking key metrics such as conversion rates, bounce rates, and engagement levels reveals what’s working and what needs improvement. If the data doesn’t support your hypothesis, revisit it and test again.
Once your Webflow A/B testing ends, it’s time to dive into the data.
A small difference in conversion rates may not mean much unless the sample size is large enough to validate the results.
Consider external factors like traffic sources, device types, and user demographics. For example, a test might show better results for mobile users but not desktop visitors. Understanding these details helps you make informed decisions.
A/B testing is an ongoing process. Use what you’ve learned to refine future tests. If the results are inconclusive, revisit your hypothesis and adjust your approach. Perhaps the element you tested wasn’t impactful enough, or outside variables affected the results.
The goal is to continuously optimize rather than just find a winner. The best-performing sites don’t rely on one or two tests but build a culture of experimentation and improvement.

Once you've mastered basic Webflow A/B testing, it's time to take things up a notch. Advanced strategies give you deeper insights and drive significant improvements.
Experiment with multiple variables simultaneously instead of testing one element at a time. For example, test different headlines, button colors, and CTA placements in the same experiment. This works best for high-traffic sites where you can gather enough data to analyze multiple variations.
Not all visitors behave the same way, so why show them identical content? By segmenting users based on factors like location, past behavior, or device type, you can tailor Webflow A/B testing to create a more personalized experience. For instance, test different homepage layouts for new visitors versus returning users.
A/B testing Webflow projects is not a one-time process. The best optimization strategies come from continuous testing and refinement. After implementing a winning variation, use it as the new baseline and test again. This iterative approach ensures that your site constantly improves based on user behavior.
A/B testing in Webflow is essential for optimizing performance and boosting conversions. Testing different headlines, layouts, and CTAs provides valuable insights that lead to better engagement and higher revenue.
For Webflow users looking for the simplest way to run A/B tests, Optibase Webflow A/B testing is the best option. It’s built specifically for Webflow, eliminating the need for third-party scripts or complex integrations. With Optibase, you can set up experiments quickly, track results accurately, and make data-driven decisions without leaving Webflow.
How do I set up A/B testing in Webflow using Optibase?
Optibase allows direct Webflow A/B testing without external scripts. Just create variations, set goals, and analyze results within its interface.
What are the best elements to test first in Webflow?
Start with major impact areas like headlines, CTAs, layouts, and forms. Small changes can lead to significant improvements.
How long should I run an A/B test before deciding on a winner?
Run A/B testing for at least two weeks, or until you reach statistical significance. Stopping too early can lead to inaccurate conclusions.